File Shredder Settings
For Advanced Users: SpyHunter gives users the ability to customize the File Shredder’s operation.
To access SpyHunter’s File Shredder settings, click the “Settings” button in the main SpyHunter window and then select the “File Shredder” tab. Alternatively, click the “Settings” button at the bottom left of the “Secure Disk Erase” subtab.
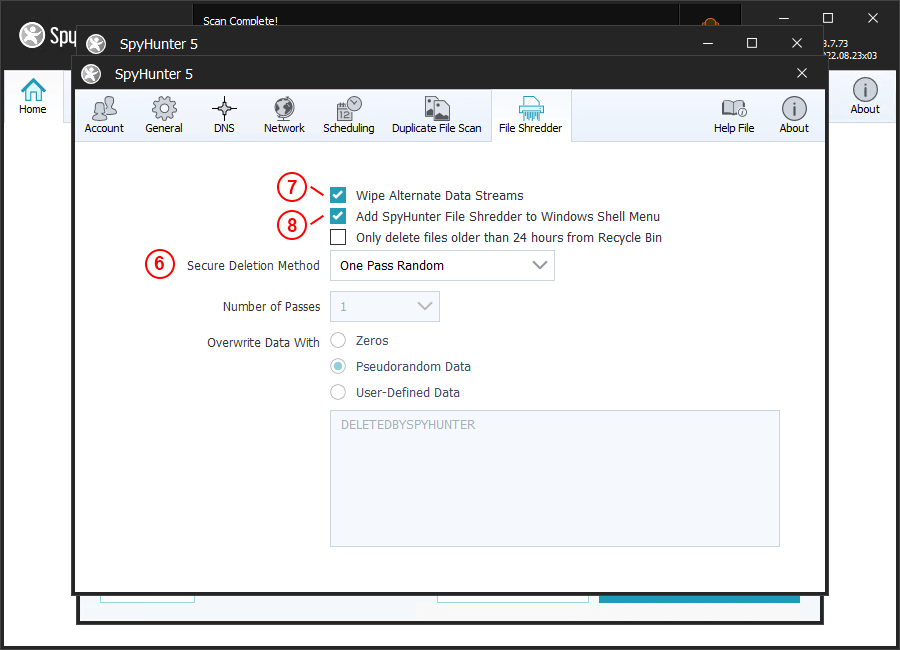
SpyHunter allows you to choose from a variety of deletion algorithms, including DoD, NIST, and NSA standards. To select a different secure deletion method, simply select it from the “Secure Deletion Method” drop-down menu (6). You can also select the “User Defined” option, which will allow you to manually select the number of write passes, and what data will be written over the data you wish to eradicate.
You can also configure the File Shredder to automatically “Wipe Windows Alternate Data Streams” (7) for additional security.
If you check “Add SpyHunter File Shredder to Windows Shell Menu,” (8) a right-click menu option will be added to the Windows shell, which allows you to add files to the File Shredder queue directly from Windows Explorer. After you have added files to the queue, you will need to go to the SpyHunter “File Shredder” tab, and click the “Shred Selected Files” button to complete the shredding operation.
You can also configure SpyHunter’s File Shredder to only delete files older than 24 hours from the Recycle Bin when you use the “Securely Empty Recycle Bin” function.