Exclusions
If SpyHunter 5 has detected an object that you do not wish to remove, you may exclude this object from future scans. To exclude a detected object, locate the object in the "Scan Results" (1), right-click the object, and select the "Exclude this detected object" (2) option from the menu that appears. To exclude an entire group of objects, right-click one of the objects and select the "Exclude this detection group" option from the menu that appears. Excluded objects and groups will be marked in the scan results with an "Exclude" (3) label. You may un-exclude an excluded object by right-clicking the object and selecting the "Un-exclude this detected object" (4) option.
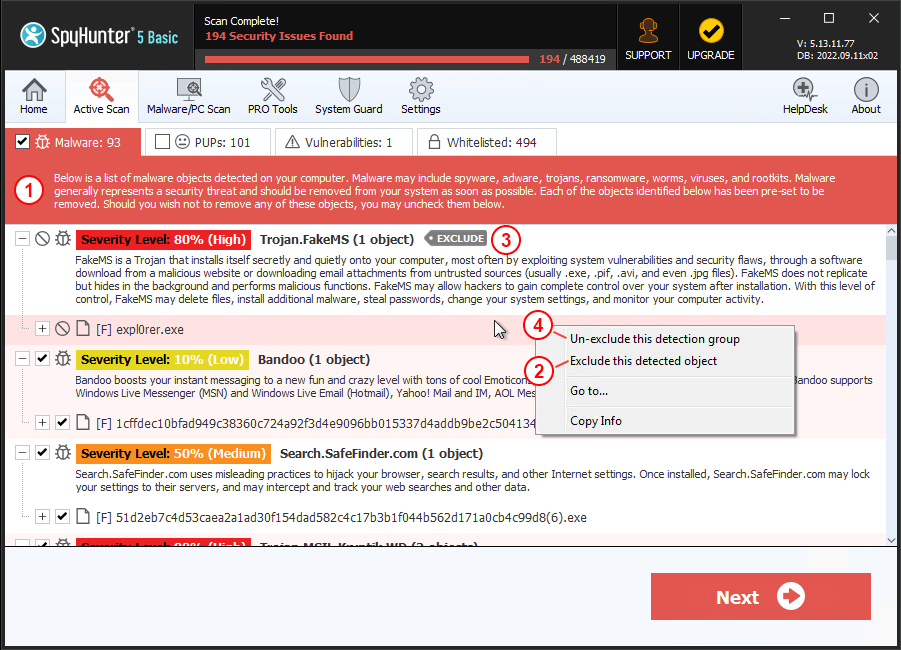
NOTE: Objects that have been added to exclusions will be configured to not be detected in SpyHunter scans and will not be blocked by SpyHunter’s system guards.
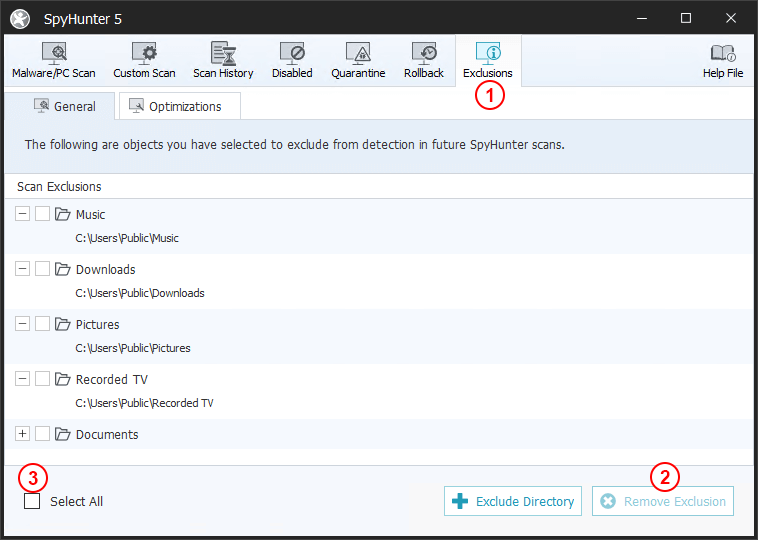
Additionally, currently excluded objects and/or detection groups can be viewed and managed in the "Exclusions" (1) list, accessible through the "Malware/PC Scan" tab. The Exclusions list contains two sub-tabs: General and Optimizations. The General tab lists user-selected objects that are excluded from general scans (Malware, PUPs, Privacy). The Optimizations tab lists user-selected objects that are excluded from SpyHunter Optimization scans.
To remove an object from exclusions, select its checkbox and click the "Remove Exclusion" (2) button at the bottom right corner of the Exclusions window. To reset all current exclusions, click the "Select All" (3) checkbox at the left and click the "Remove Exclusion" (2) button.
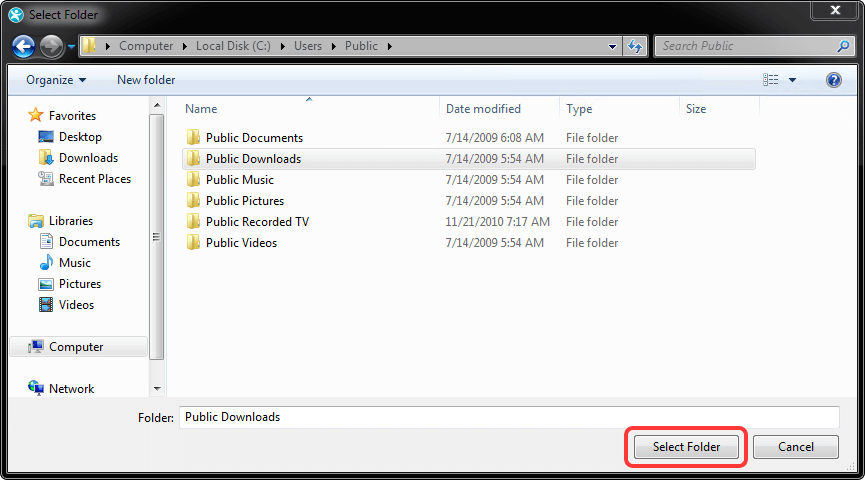
If you wish, you can exclude an entire directory from detection. To do so, simply click the "Exclude Directory" button at the bottom of the "Exclusions" window, select the folder to exclude and click the "Select Folder" button. All objects in the selected folder will be excluded from detection, including objects located in subfolders.