Scan Results View
The graphic below is a screen shot of the main RegHunter window, with numbers added to aid in explanation:
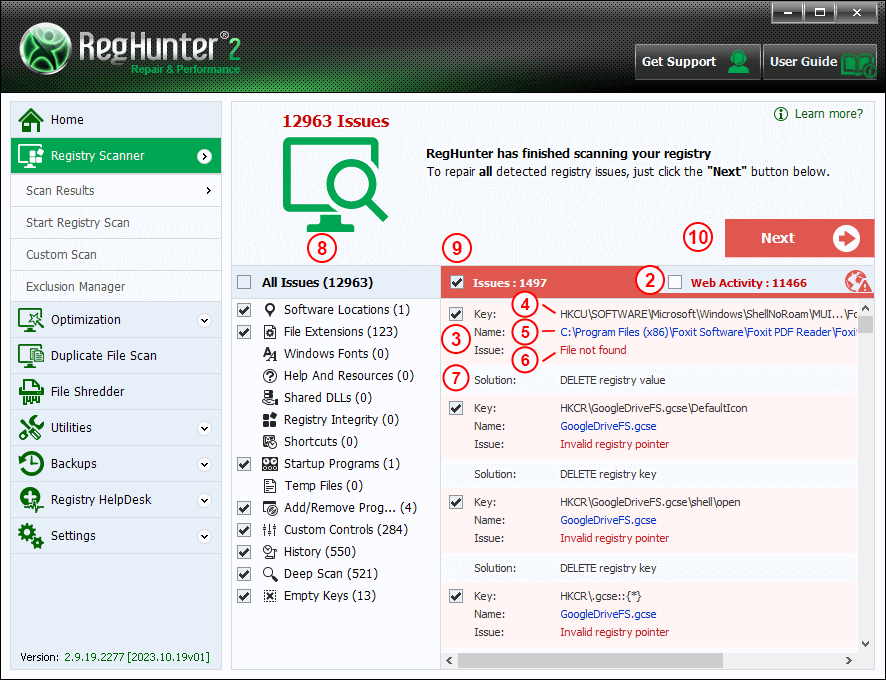
In the Scan Results view, RegHunter groups the results into two sections: system scan (“Issues”) (9) and browser scan (“Web Activity”) (2). System scan results are selected to be deleted by default while browser scan results are not. You may select individual items within the browser scan as it includes results from Internet Explorer, Firefox, Google Chrome and Opera. For each individual issue (3), RegHunter identifies the affected registry key (4), registry value name (5), problem type (6) and repair solution (7). The left column of the Scan Results view (8) groups detected issues by category. You can click on each individual category to view only the issues in that group in the right column of the Scan Results view.
At the completion of a scan, RegHunter will automatically select all issues for repair by default. If, for any reason, you do not want to repair a specific issue, simply uncheck the checkbox for that error before clicking the "Next" (10) button.
To have RegHunter repair the selected errors, simply click the "Next" (10) button.
Before RegHunter begins the repair, it will prompt you to create a backup. We strongly recommend that you do so, as you will be able to easily reverse any changes that RegHunter makes to your system if you experience any issues at all. Click here for more information on the RegHunter registry backup feature.
After the repair is completed, RegHunter will prompt you to defragment your registry, and will then display a summary of the repair results.
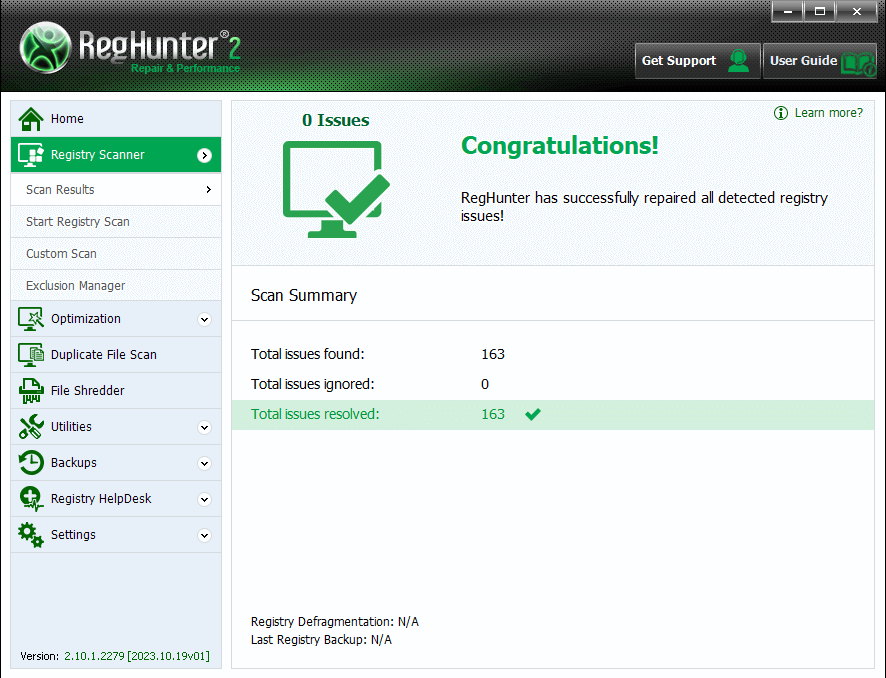
That's it! If you have followed these instructions, you have just completed RegHunter's scan and repair process!